
A thank you note is very important if you have asked someone for help. In this case, you will thank the user for filling out the form you requested with a thank you note displayed in the form of a Page.
What is the difference between a Landing Page and a Thank You Page? These two are different because they are viewed from their use. A Landing Page contains a page with information you want to spread, such as products, about the company, and so on. Meanwhile, a Thank You Page is just a thank you note displayed in the form of a Page. So, after the user fills out the Form on the Landing Page, it will be redirected to the Thank You Page that you have created. This allows you more freedom in editing.
Here's how to make it:
Create the Thank You Page first
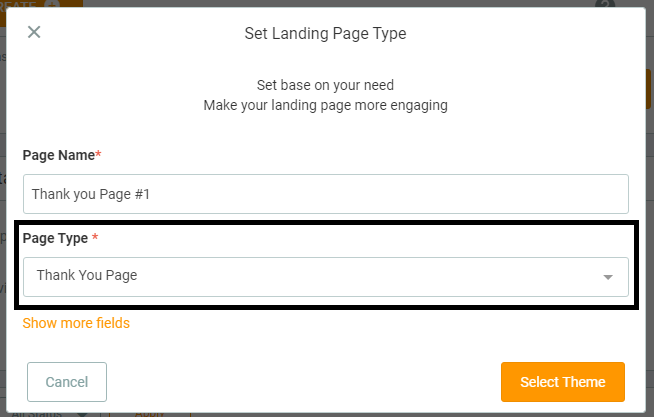
To make it easy, you just need to create it like a regular Page. But there is a step you need to pay attention to. When you click 'Create Page', here you will choose the type of Page. Select 'Thank you Page'.
Next, you will create the Page as usual.
Installing the Thank You Page
Keep in mind, here you will use 2 pages, namely the Landing Page and the Thank You Page. The Thank You Page has been created previously, now here is how to install the Thank You Page:
- Create a new Page of the Landing Page type.
- When on Page Compose, click the Form component. Select the Form you want.
- After selecting the Form, on the setting panel, select the 'After Submit' menu.
- Select 'Redirect to Thank you Page'.
- Choose the Thank You Page that you have created.
- Then click 'Save'.
Here you have successfully installed the Thank You Page. To try it out, you can open your Landing Page. Then try to fill out the Form. After you submit the data, you will be redirected to the Thank You Page.